Deploying my first Ethereum Smart Contract
01 Jun 2016Now that we have a private blockchain infrastructure, let’s write our first Smart Contract! First, a few words about what I would like to achieve based on the scenario I described before…
Design of the Smart Contract
Here are a few bullet points about what I would like to achieve with the Smart Contract. I will first get the basics working and then hopefully evolve the contract to handle more features.
- The energy producer will issue transactions (sales) for each kWh produced.
- This will allocate him a reward based on the current kWh rate.
- The rate should vary with the amount of total energy produced, i.e. if more kWh are sold the rate goes down.
- The contract should calculate the rate.
- An energy consumer can also purchase some kWh at the current rate.
- The rate should vary with the amount of energy purchased, i.e. if more kWh are bought the rate goes up.
- The contract can expose the current rate, and also total energy traded.
Tooling
We will first use the common Ethereum “native” tools to develop the application and deploy it to our private blockchain, so we have an idea how everything works. Then in my next blog posts I will try a few integrated environments and frameworks like Ether.Camp, Truffle or BlockApps to see how they can improve the experience.
Here are a few of the resources that I used while coding my first contract.
- The official Solidity documentation
- The contract tutorial on the Ethereum GitHub Wiki
- The Ethereum crypto-currency/coin/token tutorial
Coding
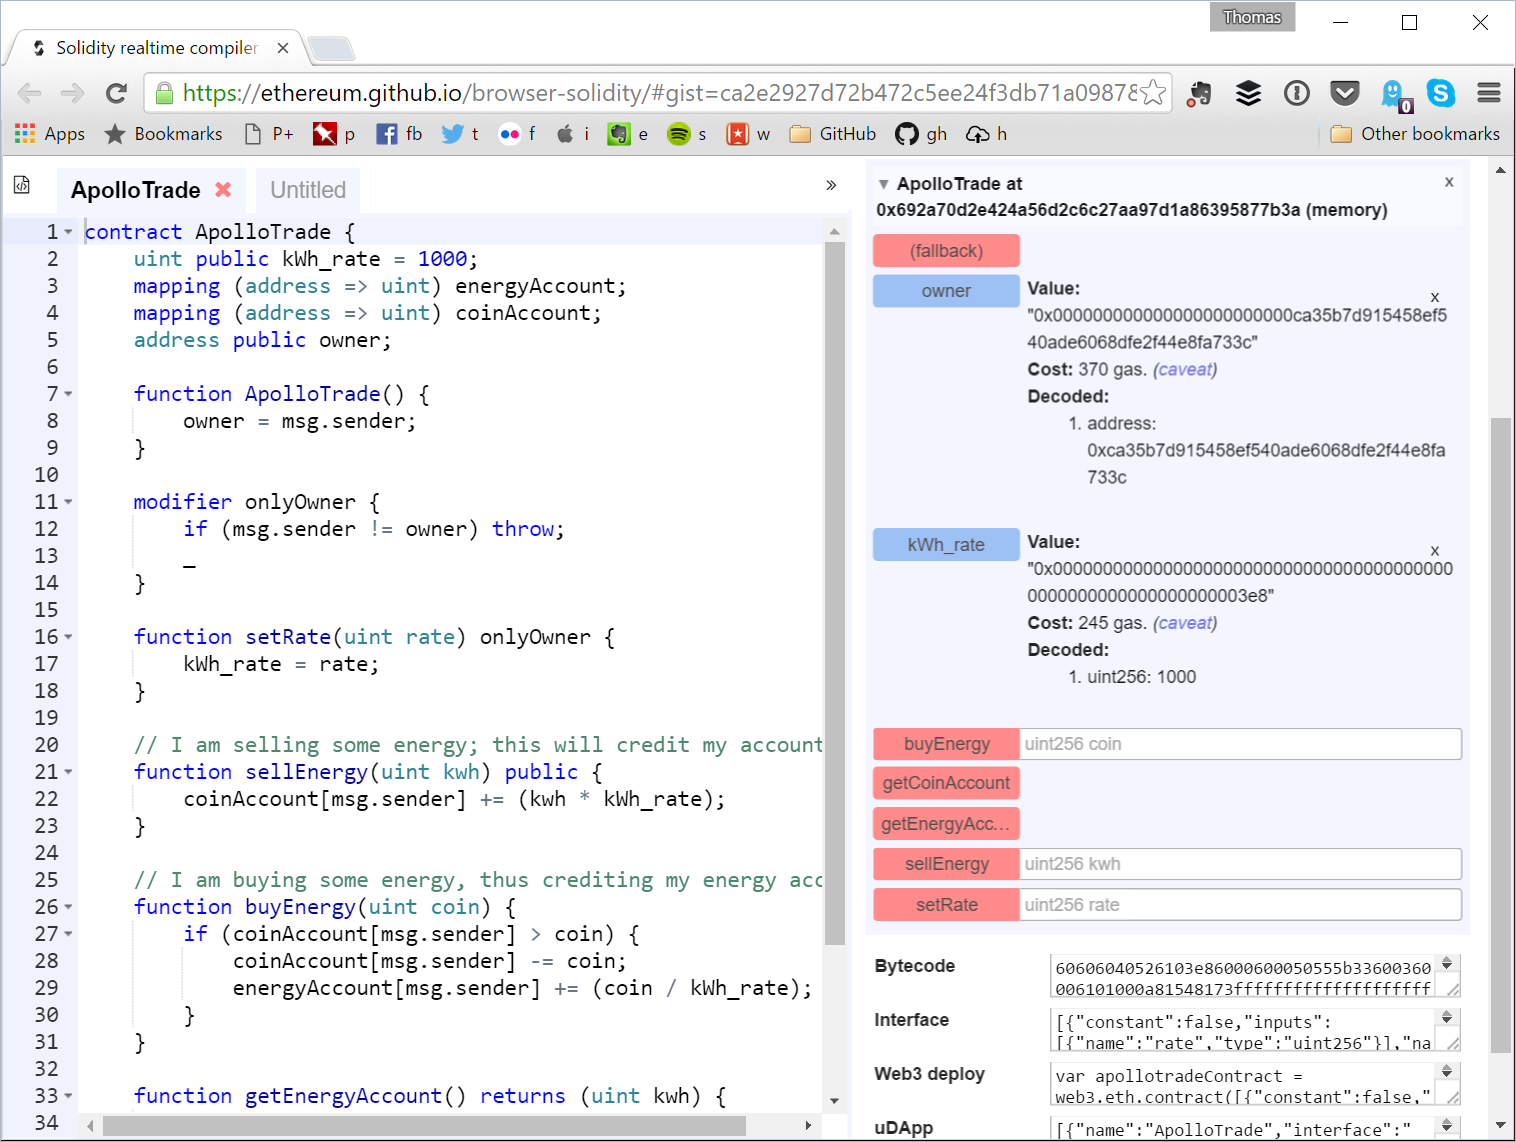
For my first attempt, I will be using Ethereum’s browser-based compiler. It is a simple but effective tool that allows you to code your smart contract (with syntax highlighting), compile it and test it (e.g. issue calls and transactions), all from the comfort of your browser.
Here is my first attempt as a Gist, and the whole code inline:
contract ApolloTrade {
    uint public kWh_rate = 1000;
    mapping (address => uint) energyAccount;
    mapping (address => uint) coinAccount;
    address public owner;

    function ApolloTrade() {
        owner = msg.sender;
    }

    modifier onlyOwner {
        if (msg.sender != owner) throw;
        _
    }

    function setRate(uint rate) onlyOwner {
        kWh_rate = rate;
    }

    // I am selling some energy; this will credit my account
    function sellEnergy(uint kwh) public {
        coinAccount[msg.sender] += (kwh * kWh_rate);
    }

    // I am buying some energy, thus crediting my energy account
    function buyEnergy(uint coin) {
        if (coinAccount[msg.sender] > coin) {
            coinAccount[msg.sender] -= coin;
            energyAccount[msg.sender] += (coin / kWh_rate);
        }
    }

    function getEnergyAccount() returns (uint kwh) {
        return energyAccount[msg.sender];
    }

    function getCoinAccount() returns (uint coin) {
        return coinAccount[msg.sender];
    }
}
For the moment this is pretty simple. I have a couple arrays called energyAccount and coinAccount to keep track of how much energy and coins a user has. These arrays are indexed using the address of the user (or more precisely, of his account). The sellEnergy() and buyEnergy() methods are used to perform the actions of exchanging kWh for coins and vice versa. You can see the logic here is super simple, basically you can only buy energy if you have enough coins, and to get coins you must sell some energy.
The are also getCoinAccount() and getEnergyAccount() methods that will tell you how many coins or kWh you currently own. Remember we are basically creating our own currency here, and we are not using Ether but our own (super simple) coins.
I also included a setRate() method that could be used to change the price for one kWh. Currently I am not managing the exchange rate yet, I will dig into that later!
Now let’s try our contract. To load the Gist directly into the Ethereum browser-based compiler, you can use this URL:
https://ethereum.github.io/browser-solidity/#gist=ca2e2927d72b472c5ee24f3db71a0987
This will load the source code and compile it. Click on the friendly red “Create” button to run the contract! You can now interact with it using red buttons. For example, enter a value in the setEnergy field and press the corresponding button. Then click the getCoinAccount button to check that you were credited with some coins.
And now a few things I found out while iterating on this first version:
- There is no need to create getters for public members (e.g.
rate), they will be automatically exposed. - Solidity does not have a fixed point number type! I am merely doing additions and subtractions at this point, however for rate calculations this is kind of awkward. The best practice seems to use multipliers, e.g. do all calculations times 1,000 and then divide the end result.
- Solidity does have time management (
now) and time units, this should come in handy to do time-based calculations. - Since the contract is not going to be receiving or sending actual Ether, we should disable the default
sendfunction. - Some method calls should be restricted, for example
setRate()should only be callable from the owner… For this, in Solidity we can use a “modifier” which can execute a pre-call condition. In my example, theonlyOwnermodifier is used to restrict access to thesetRate()function. - The default function visibility is “public”, so no need to specify that explicitly.
Deploying
Now that we have our code running in the compiler, we want to deploy it to our private blockchain! You can check out my previous article to find out which setup I am using. In the spirit of learning, I am again going to do this using just the basic tools, i.e. the geth console.
Using the online compiler, it’s pretty simple to export the contract code: just copy the code in the “web3 deploy” text box and paste it into a geth console. After a little while (the contract needs to be mined) you should see something like this:
Contract mined!
address: 0xd761201a95b4e02ccdf720a40350e750d0245a9e
transactionHash: 0x1ec5e7186f7fd7a0d43e5226a06711e2d915e26b53154d4ebef981d58d2570ff
The address of the contract will be useful later, when you want to call it from another node. However for now, the deployment code should have created a nice JavaScript object that you can use right away to call the contract. In my case, the object is named apollotrade. We can use the web3 API to call methods (i.e. read values) and also to send transactions (i.e. change the contract state). For more details about the difference between transactions and calls, see the Contracts and Transactions documentation.
Basically here is how to sell some energy (via a transaction) and then retrieve your balance (via a call):
web3.eth.defaultAccount = eth.accounts[0]
apollotrade.sellEnergy(10)
apollotrade.getCoinAccount.call()
Since the contract is deployed on the blockchain, you can also use it from the Raspberry Pi: all you need to do is to get the ABI (Application Binary Interface) from the online compiler (the “interface” text box) and paste it into the geth console on the Pi in this way:
var abi = [...]
You should also define a variable for the contract’s address, as shown above:
var address = "0xd761201a95b4e02ccdf720a40350e750d0245a9e"
And then you can define the contract object locally:
var apollotrade = eth.contract(abi).at(address)
You can now interact with the contract using the apollotrade object from the Raspberry Pi geth console, in the same way as shown above, e.g. using transactions and calls.
Note that it takes a while for a transaction to be executed, e.g. mined within the network and then the result retrieved locally. This is definitely a significant aspect of the blockchain platform: the contract interactions are inherently asynchronous, and might even take several minutes to be executed if the blockchain gets busy! This will certainly impact the UI layer, which is what I will be working on in the next iteration.